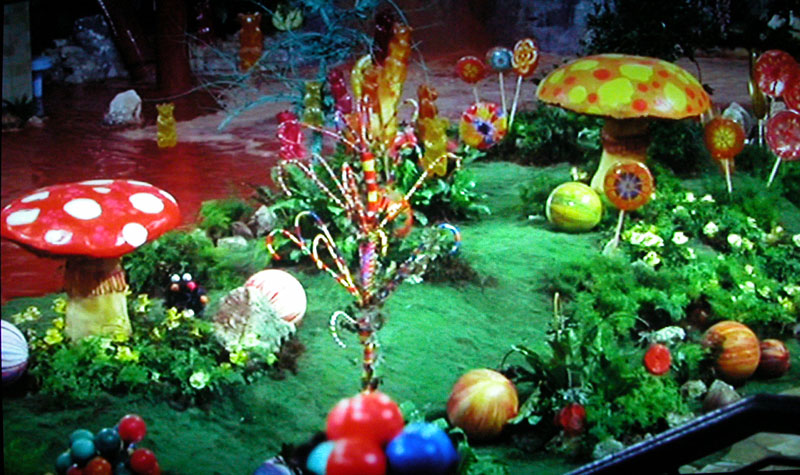
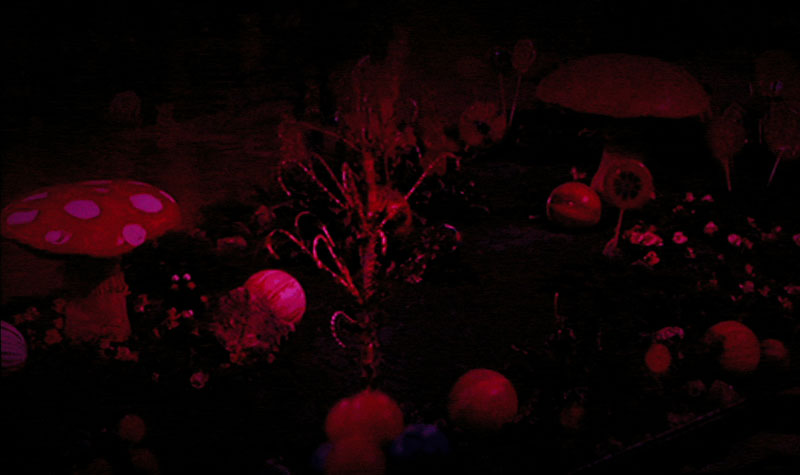
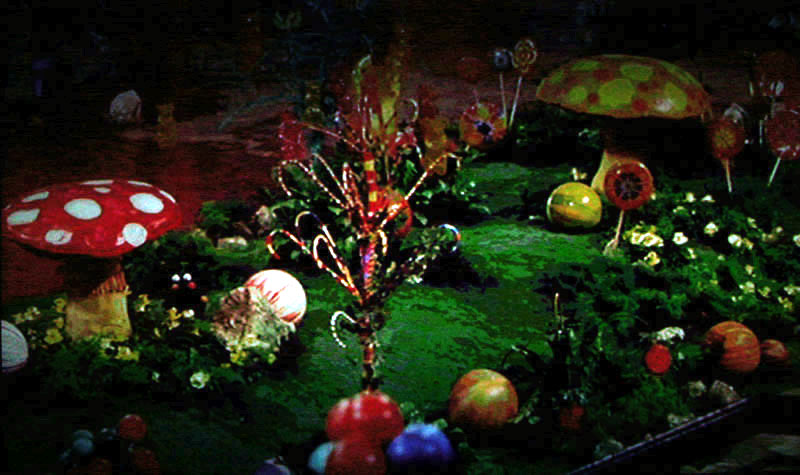
Shutter Speed: 1/60"
This is the image I will use as the "baseline" image. This is the fully constructed image as you would see it under normal viewing conditions.
Bryan's HLM507W DLP Image Deconstruction Experiment
I put this little collection of pics in response to some comments or ideas that people had about DLP, the color wheel and grayscale resolution. I wanted to see how the DLP projected image would be broken down by using high speed photography. I figured an image that had a wide variety of colors would be best for this experiment, so I chose this frame from the Willy Wonka and the Chocolate Factory DVD.
These images were taken with my Nikon CoolPix 5000 digital camera from approximately 33 inches away from the screen, with the height of the lens at the center of the screen. Using manual mode, I locked down the aperture and exposure settings to F2.8, and ISO 400, changing only the shutter speed. The images were taken straight from the camera, and besides being resized and JPEG compressed, have not been modified in any way.
Each of the images below links to a larger version.
Shutter Speed: 1/60"
This is the image I will use as the "baseline" image. This is the
fully constructed image as you would see it under normal viewing conditions.
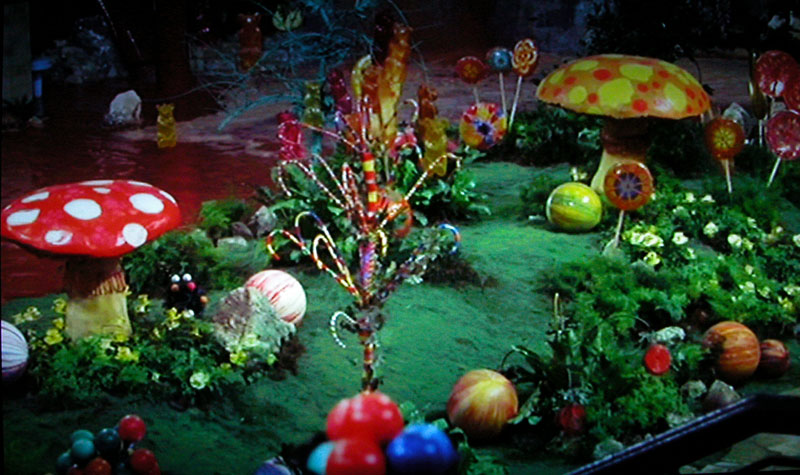
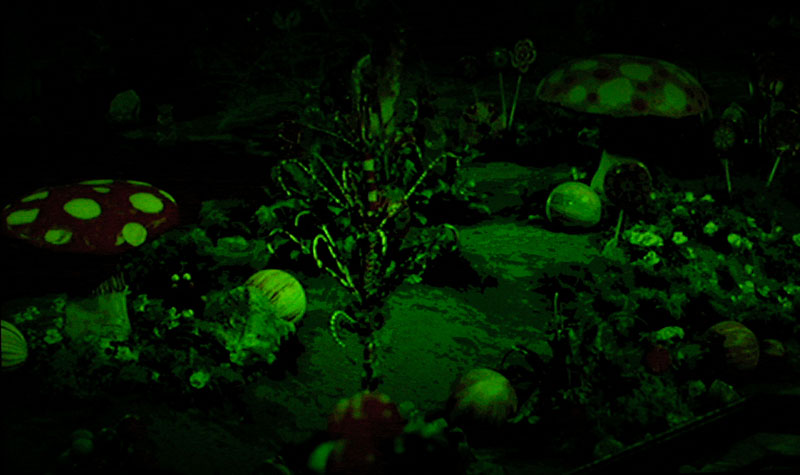
Shutter Speed: 1/125"
At 1/125" the image looks about the same as the baseline image, just a
bit dimmer, with all of the colors properly constructed.
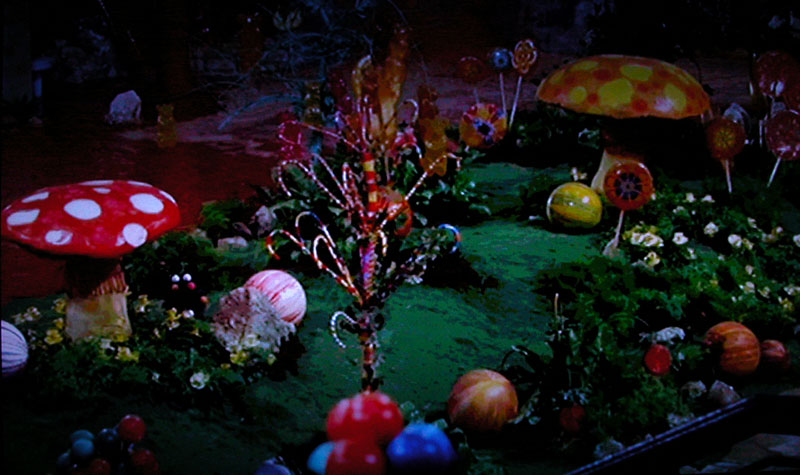
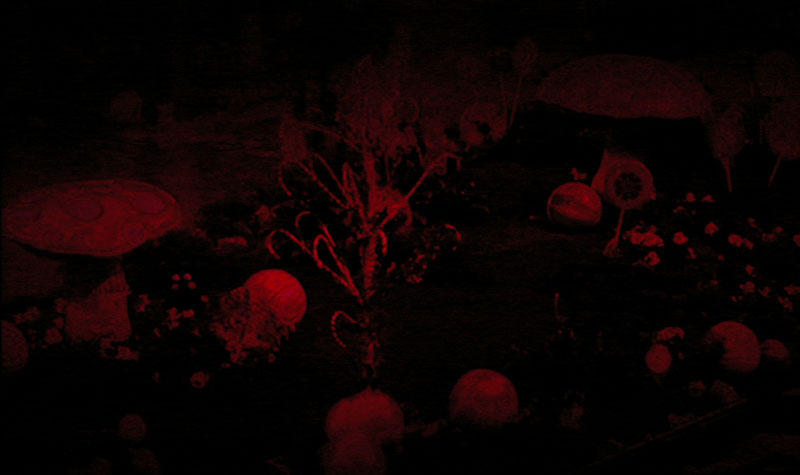
Shutter Speed: 1/250"
The image is now starting to come apart a bit. You can see that the brightness
of the greens in the grass appears to be "clipped" at a fairly low
level, but otherwise, the color mixture appears well balanced. It would seem
that the color wheel spins fast enough that a sample of 1/250th of a second
is long enough to maintain proper color balance. I'd like to note that a "refresh
rate" of 250 times per second would be well beyond the range that the human
eye is capable of discerning.
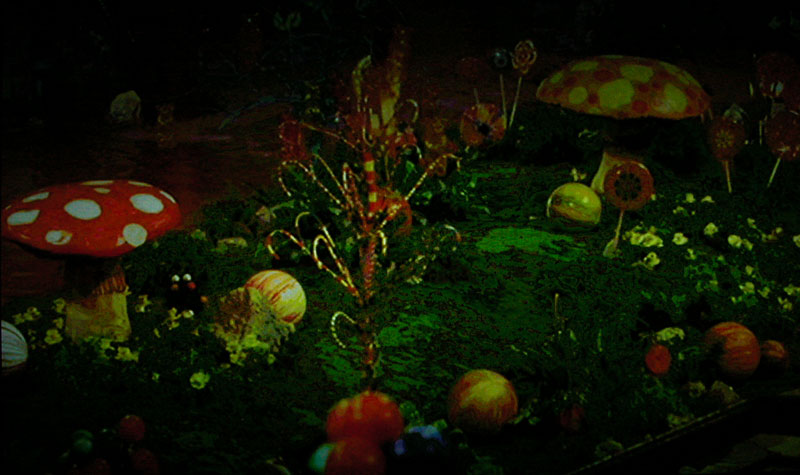
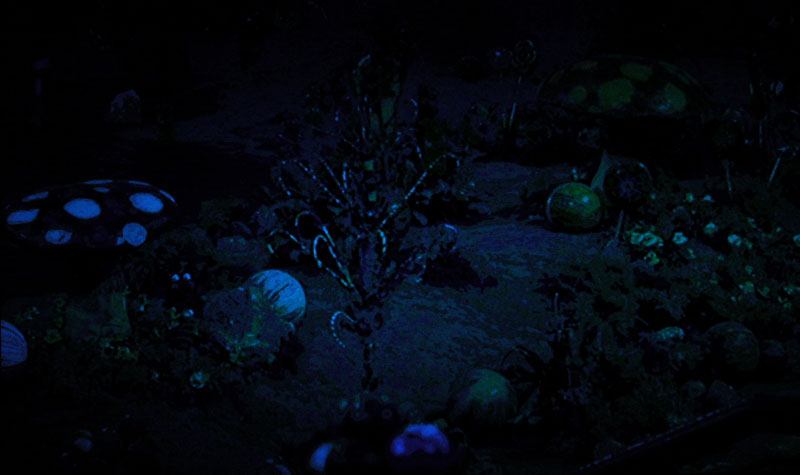
Shutter Speed: 1/500"
Finally at 1/500th of a second the shutter speed is short enough to get an unbalanced
color image. This image appears to have a yellow tint compared to the other
images, which suggests that the shutter was not open long enough to capture
as much of the blue section of the color wheel when compared to how much time
the red and green sections were exposed for. The image is of course darker,
as the faster the shutter speed, the less light can be captured by the camera.
Shutter Speed: 1/1000"
At a thousanth of a second, we can almost, but not quite, "freeze"
the motion of the color wheel. Here, the red portion of the color wheel was
in front of the lamp for almost the entire duration of the exposure.
Shutter Speed: 1/1000"
Here we can more clearly see how a shutter speed 1/1000th of a second is not
quite fast enough to "freeze" the motion of the color wheel, as you
can see a slight hint of red in the tops of the mushrooms. Some people were
raising concerns about the number of levels of brightness that the DMD chip
would be able to actually produce when taking into account the limitations of
how fast the mirrors can physically flip on and off. We can see here in this
image that even within the span of 0.001 seconds, the DMD chip was able to produce
a fairly wide range of levels of brightness between the brightest and darkest
sections of the image.
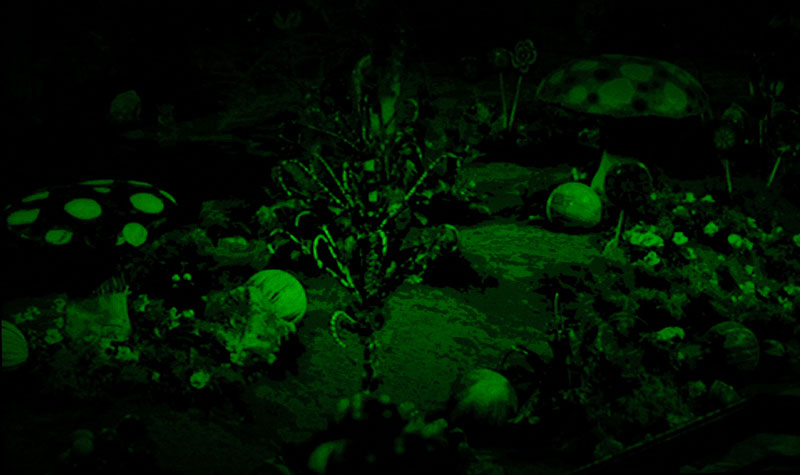
Shutter Speed: 1/1000"
The blue component, exhibiting a slight touch of green.
Shutter Speed: 1/2000"
Finally at a shutter speed of 1/2000th of a second we can "freeze"
the motion of the color wheel and deconstruct the image into its separate red,
green and blue channels.
Shutter Speed: 1/2000"
Here we can see the impressive speed at which the DMD chip can work. In the
span of 0.0005 seconds, the DMD chip is able to create (in my approximation)
about 170 levels of brightness. The way I measured this was by first converting
this image to grayscale, then counting the number of different shades of grey
in the image. I don't know if that is an acceptable way of measuring this, but
it's the only way I could think of doing it.
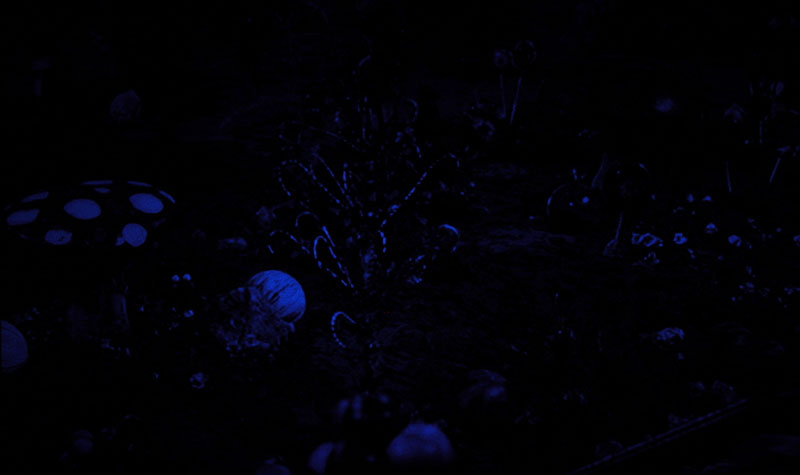
Shutter Speed: 1/2000"
The blue component.
This final image was one I made just for fun. I took each of the three components
as shot at 1/2000th of a second, and combined them using photoshop to recompose
the image. I then used the "Auto Levels" command to bring the resulting
image (which was quite dim from being sampled from such a fast shutter speed)
back into a more visible range. Much of the color resolution has survived the
process.
Last Updated January 23, 2003